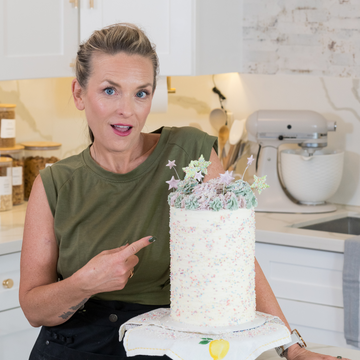
Wisteria Cake: A Dreamy Creation Designed by Chef Maeve

Ready to create a spectacular cake that sparkles with every bite? We’ve teamed up with the fabulous Chef Maeve to bring you the Wisteria cake, a dreamy creation that will have you shooting for and landing among the stars.

This cake is sprinkled with charm and stars, making it a true all occasion cake from baby showers to first birthdays to just because days!
Watch & Learn from Chef Maeve
Base Cake Size: 4” to 6” (Base of Cake should be Buttercream)
What’s in the Cake Kit:
1 Starry Eyed Halo Sprinkle
1 Pastel Rain Halo Sprinkle
1 Wisteria Luster Dust
1 Avocado Luster Dust
3oz White Diamond Sugar
3 ¾” Stars on Wire
3 1/8” Stars on Wire
3 1.5” Stars on Wire
Tools Needed: Paint Brush, Everclear Alcohol
Estimated Assembly Time: 30-40 min
Step-by-Step Instructions
Step 1: Sprinkle the Magic
Open up those beautiful sprinkles and gently toss them onto the side of the cake, turning the base to cover all sides. Start with the Starry Eyed Halo Sprinkles, adding them to your buttercream-covered cake. Go for a second coat using the Pastel Rain Halo Sprinkles, creating a dreamy base layer.
Step 2: Color Buttercream & Add Rosettes
Separate two bowls of white buttercream icing. Gently tap the side of the dust container to add some of the Luster Wisteria and Luster Avocado to each bowl and mix in the color. This gives your cake that beautiful, muted color that makes it stand out.
Next, add the Wisteria colored buttercream to your piping bag and make generous rosettes on the top of the cake, allowing space in between for the Luster colored buttercream. Once the Wisteria rosettes are finished, add the Avocado buttercream to a bag and pipe smaller rosettes in between each Wisteria rosette. If you want to switch the emphasis of the colors (more Avocado than Wisteria), go for it! There are no right and wrong ways to create!
Tip: If you are not comfortable piping the icing, practice making a few beforehand on a plate until you get the hang of it. And if you make a mistake on the cake, don't worry! Just use a knife to gently lift the rosette off the cake and try again!

Step 3: Paint the Stars
In two separate small bowls, add some of the dust to everclear alcohol and mix. Paint the stars and allow them to dry - the Everclear helps them dry faster.
Do not use water to mix the colors! Water will 'melt' your stars and break down the gumpaste.
Once dry, add the stars on wire to your cake. Start with the largest stars and work your way down to the smallest, arranging them in a way that looks fun and whimsical.

Step 4: Finish with Diamond Sugar
Sprinkle the White Diamond Sugar over the cake for that extra touch of sparkle, adding a dusting of magic to your creation.
Congratulations! You’ve just crafted a Wisteria cake that’s a work of art. With Chef Maeve’s design and your creative touch, you’re ready to show off your new cake decorating skills!


